How to Add an Image Picker to Easy Form Builder Plugin?
Easy Form Builder is a useful plugin for designing custom forms on your WordPress site. In this tutorial, we will walk you through the steps on how to add an image picker input field using Easy Form Builder.
Before we begin, make sure that you have Easy Form Builder installed and activated on your website. Once you have done that, follow the steps below to add an image picker field to your form.
- Create a New Form
- Add image picker Field
- Customize the WordPress image picker field
- Add Your image picker Form to Your Website
Step 1: Create a New Form
Log in to your WordPress admin area and go to the Forms Overview page by clicking on Easy Form Builder in the admin sidebar. Click the “Create” button in the sidebar to launch the Easy Form Builder. Choose the type of form you want to create. For this tutorial, we’ll be creating a new form.
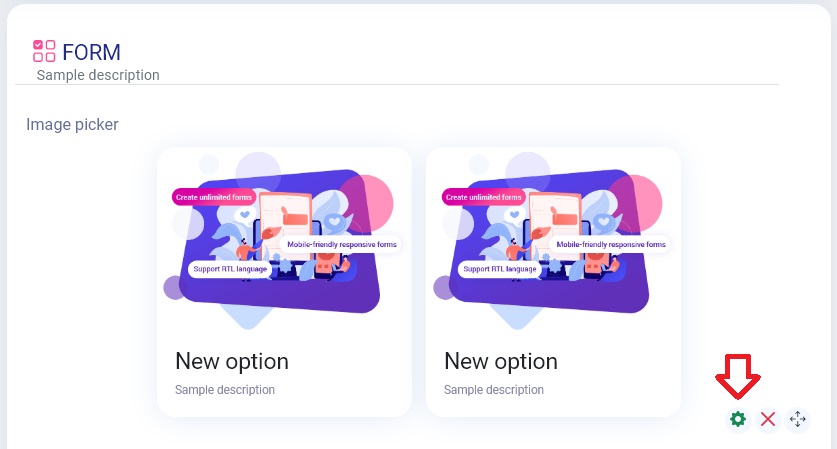
Step 2: Add Image Picker Field
In Easy Form Builder, you can easily add an image picker field by clicking on the “Image Picker” field or dragging and dropping it onto your form.

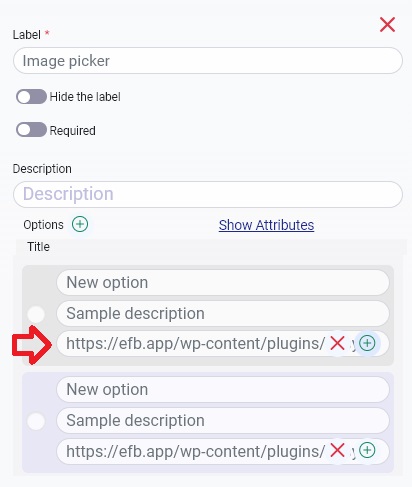
Step 3: Customize the Image Picker Field
To customize your image picker field, navigate to the “Field Setting” section as shown below. In this area, you can upload your desired image and add a title and description.
You can also change the label name, hide the label, make the field required, add a description, and add unlimited images to the field. To add an image, simply upload the image to your site or any other site and insert its URL in the URL input box.
Step 4: Add Your Image Picker Form to Your Website
Your image picker form is now ready to use without the need for coding.

In conclusion, adding an image picker input field in Easy Form Builder is a quick and easy process. With these simple steps, you can enhance your form with an image picker field.