How to Customize Step Names and Icons in Your Forms: A Step-by-Step Guide
Customizing your form’s step names and icons can enhance your form’s appearance and improve submission rates. In this tutorial, we’ll guide you through the process of changing the step names and icons of your forms using the Easy Form Builder WordPress plugin.
In this essay, we’ll introduce you to how to customize the Step Name and the following options for Step Name.
- Changing the label Text
- Changing the Description Text
- Changing the Icon
- Changing the Label Color
- Changing the Description Color
- Changing the Icon Color
- CSS Classes
Notice:
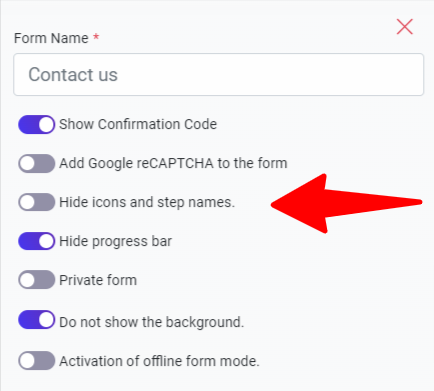
In the Easy Form Builder, by default, the form title and icon are hidden, and to display them upon publication, click on the form settings and disable the “Hide icons and step names” toggle.
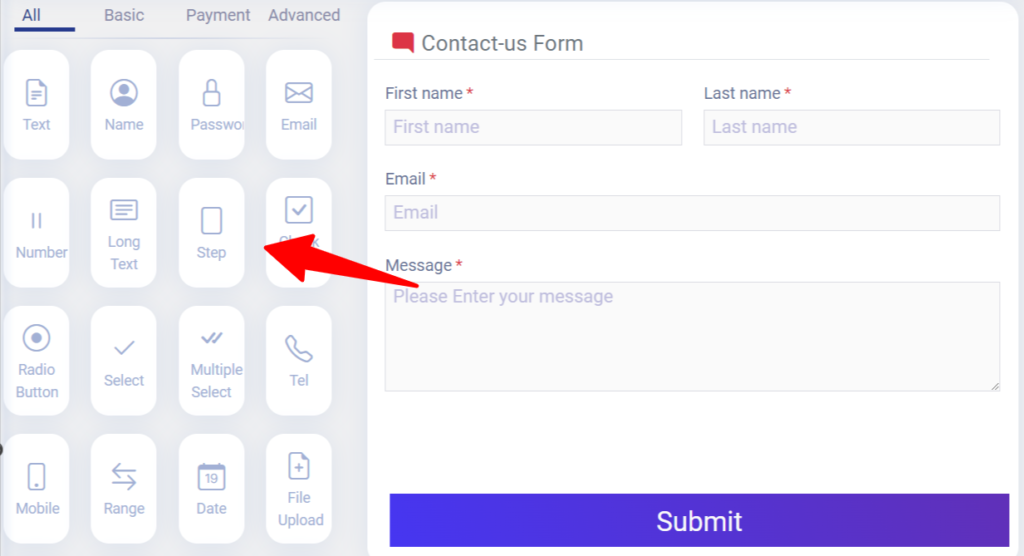
Step 1: Create Your Form and Access the Step Settings
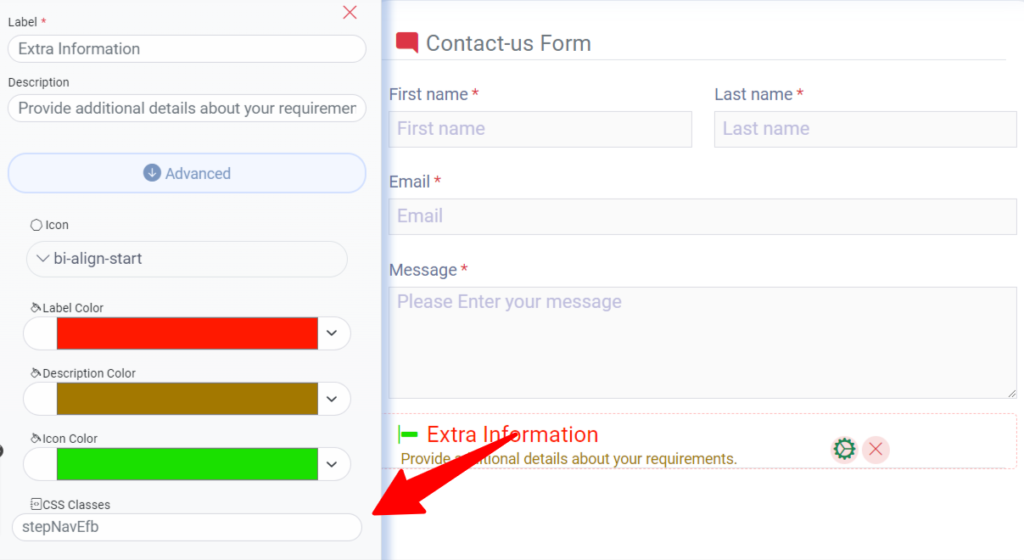
After installing the Easy Form Builder plugin, create your form and click on the field step. Here, you’ll see a list of all the steps in your form.
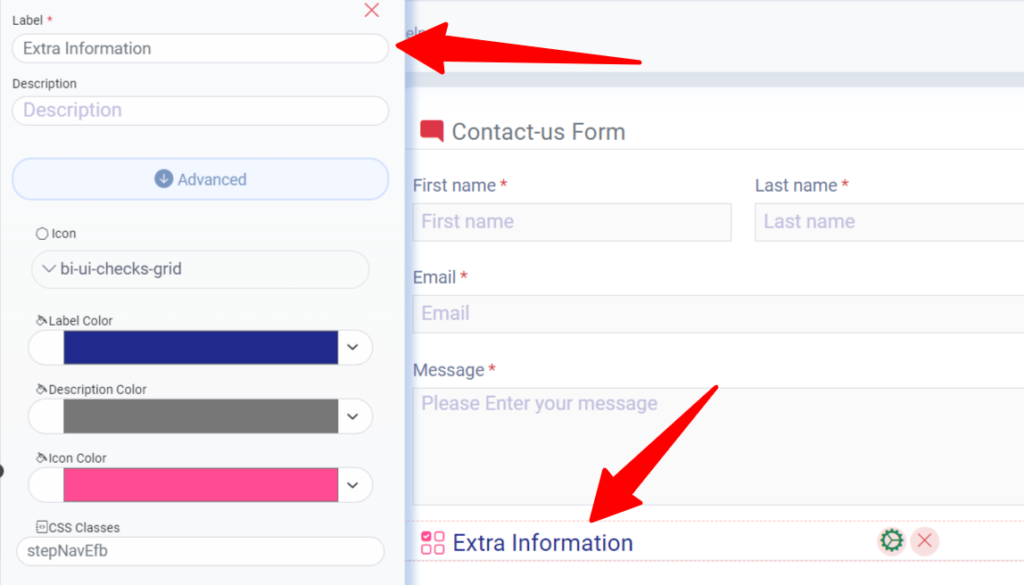
In setting you to have 7 options for changing and stylizing your step:
Step 2: Customize Your Step Names and Icons
In the step settings, you’ll find several options for customizing your step names and icons. These include:
Changing the label text : To change the label text, simply erase the existing text and type in your desired text.
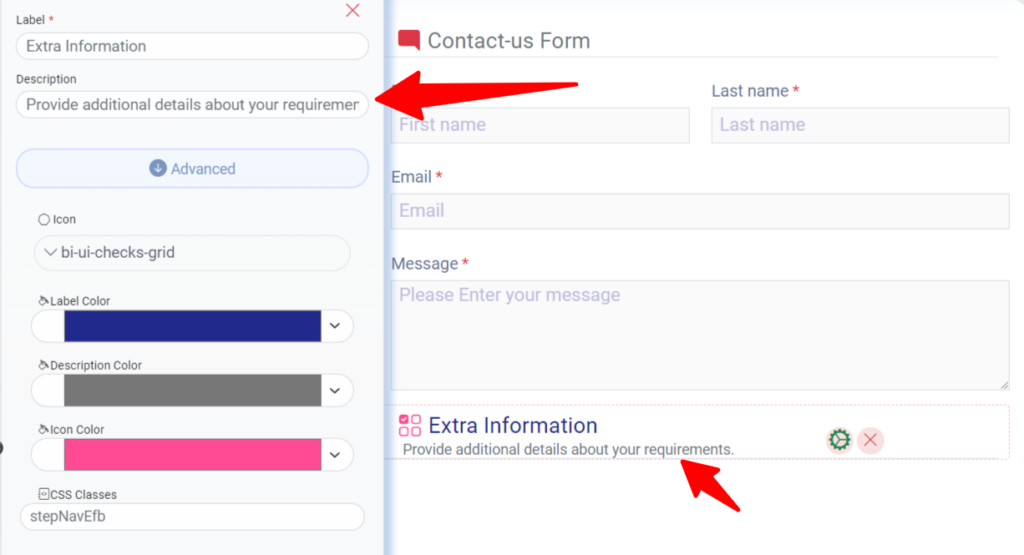
Changing the description text : To change the description text, erase the existing text and type in your desired text.
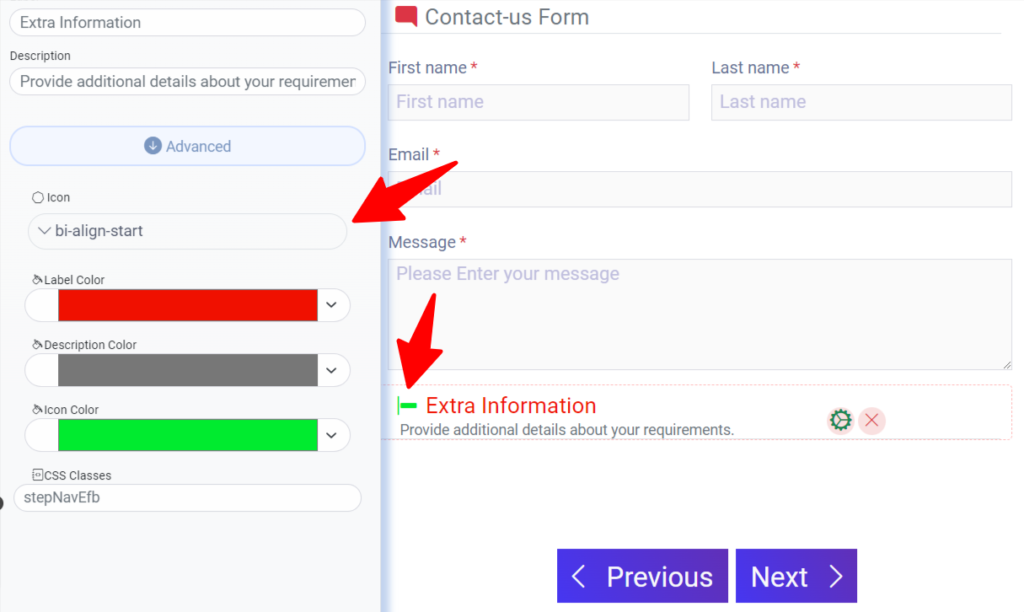
Changing the icon : To change the icon, click on the icon field and select your desired icon.
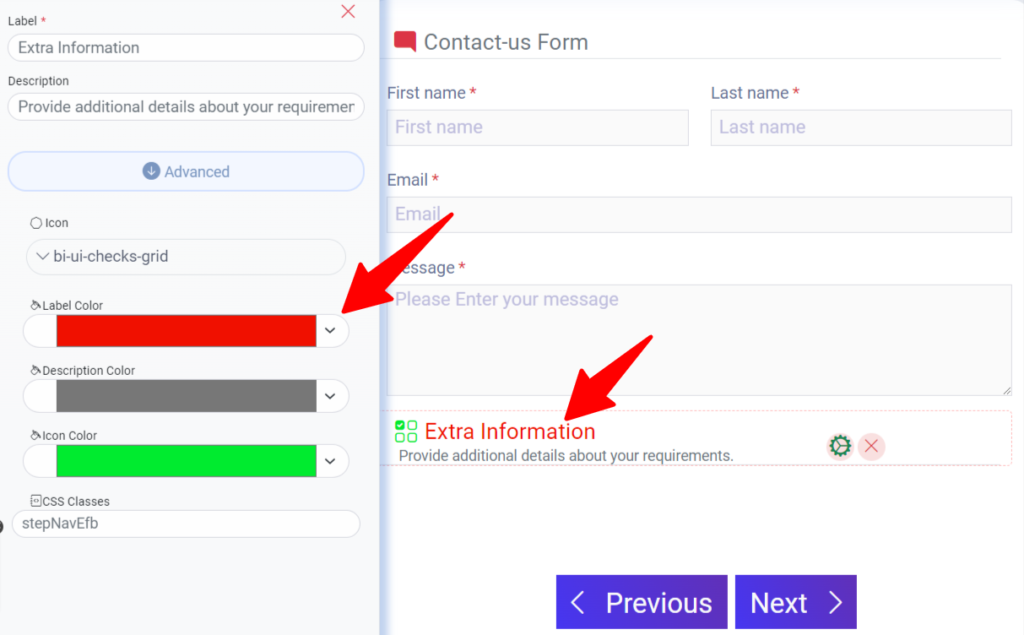
Changing the label color: To change the label color, click on the colored field and select your desired color.
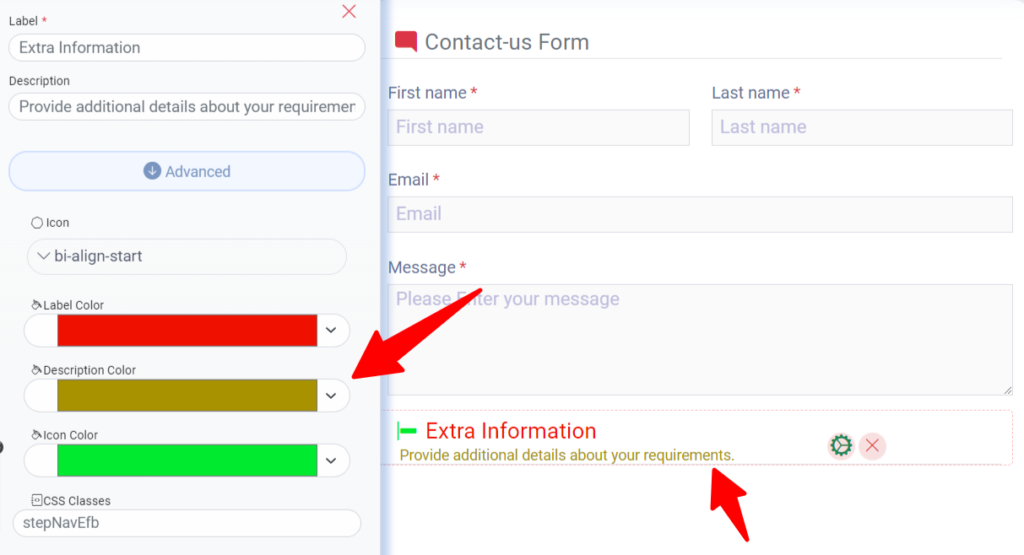
Changing the description color: To change the description color, click on the colored field and select your desired color.
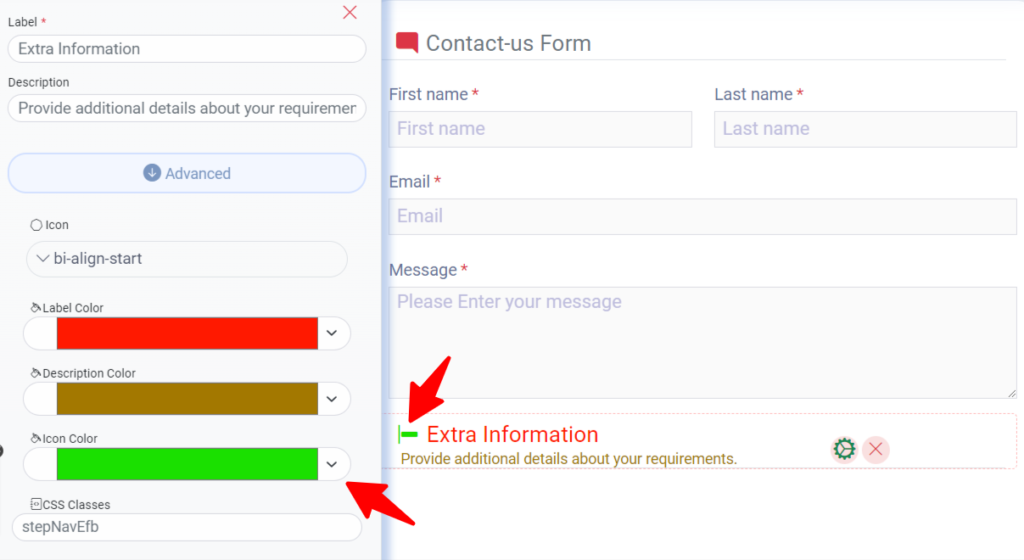
Changing the icon color: To change the icon color, click on the colored field and select your desired color.
Adding CSS classes: You can add your own custom CSS classes to further customize your step.
Step 3: Save and Embed Your Form
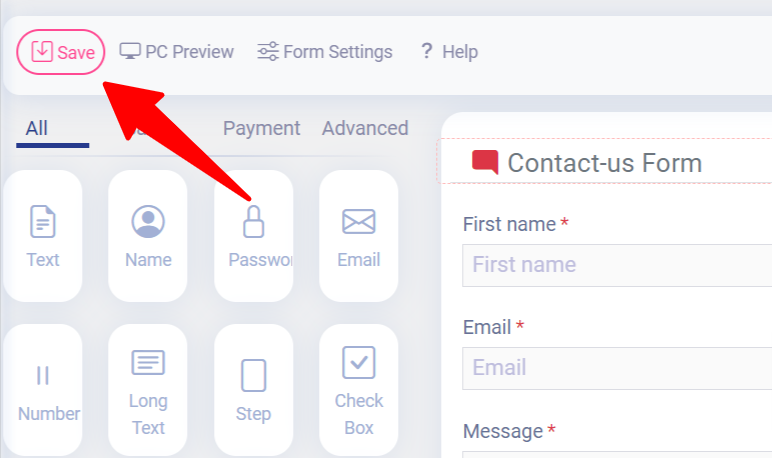
After customizing your step names and icons, save your form and copy the shortcode provided. To display your form on your website, paste the shortcode into a post or page using the block editor. After publishing your post or page, your form will be live and ready to use.

Displaying Forms on Your Site
To get started, open the page editor where you want to add your form. Next, click on the plus (+) icon in the upper left corner to add a new block. Select the “shortcode” block from the list of available blocks.
Then, paste the shortcode of your form into the shortcode block.
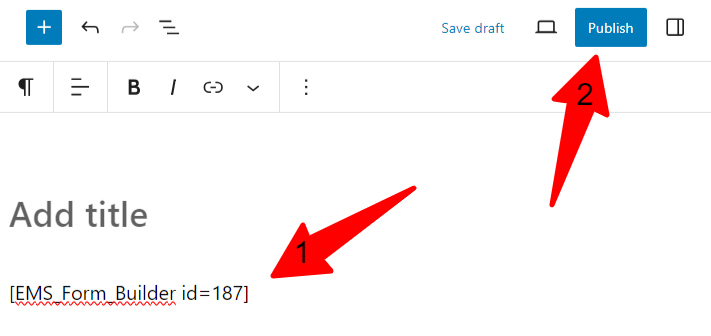
Finally, click on the “view post” button to see your form in action. You should be able to see your form embedded within the page or post where you added the shortcode.
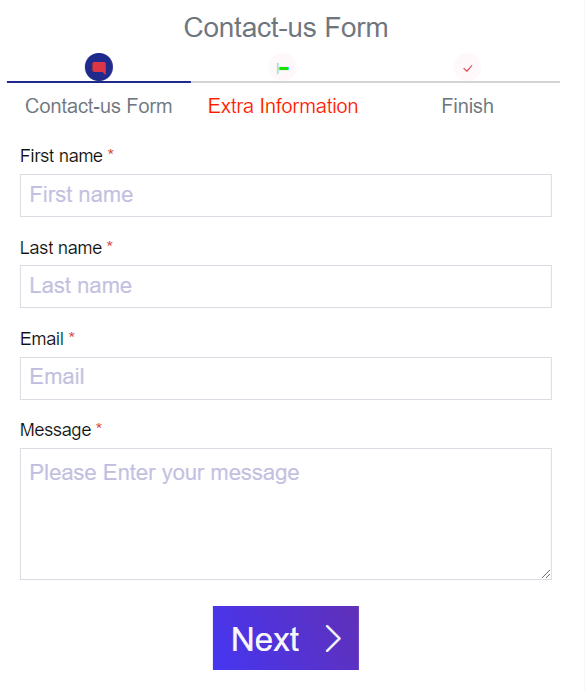
In conclusion, customizing your form’s step names and icons using the Easy Form Builder plugin is a quick and simple way to improve the appearance and functionality of your forms. Give it a try and see the results for yourself!