How to Create a File Upload Form in WordPress
In this article, you’ll learn how to add a file upload field and a drag & drop file upload field to your form using Easy Form Builder.
1. Add a New Form Using Easy Form Builder
2. Customize the WordPress File Upload Form
3. File Upload Vs Drag & Drop File Upload
4. Add Your File Upload Form to Your Website
5. View the Uploaded Files in WordPress
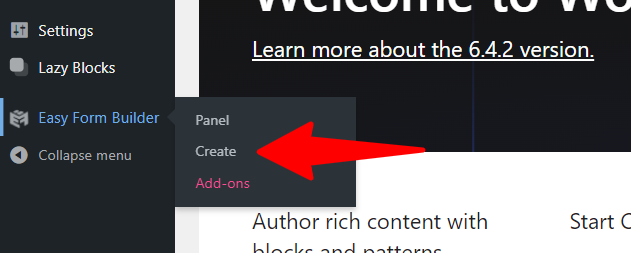
1. Add a New Form Using Easy Form Builder
Creating A New Form
Before getting started, make sure you’ve installed and activated Easy Form Builder on your site.
To begin, log into the WordPress admin area, and click on Easy Form Builder in the admin sidebar to go to the Forms Overview page. Then, click on the “Create” button in the sidebar to launch the Easy Form Builder.
On this page, you will need to choose the type of form you need. In this tutorial, we’ll be creating a contact us form.
On this page of the form builder, you will need to choose your needed form.in this essay, we will recognize how to create a contact-us form.

2. Customize the WordPress File Upload Form
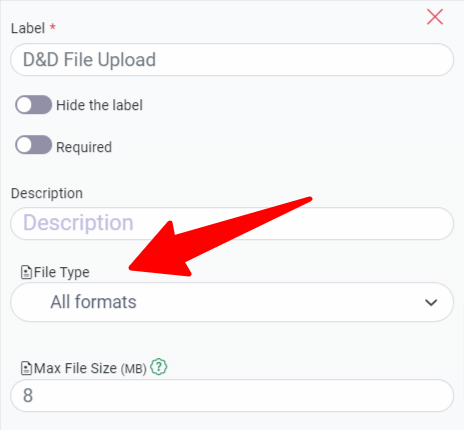
In this step, you can add two types of file upload fields: the file upload field, which is available in the free version, and the drag & drop file upload field, which is available in the pro version. Keep in mind that you can add the File Upload field to any WordPress form you create.
To customize the file upload form, click on the file upload field and change the label, description, label size, label color, description color, border color, label position, label alignment, description alignment, width, height, corners, and max file size. maximum file size.
Wondering where these file uploads will be stored?
By default, all files uploaded by users are stored in the Easy Form Builder folder inside the your WordPress site.
Note: Easy Form Builder allows uploading files up to 500 MB. However, to use this feature, you need to adjust some settings on your server, as PHP servers by default do not allow file uploads larger than 20 MB.
Note: File upload restrictions are directly related to the server resources you have purchased. Therefore, make sure you select the size you enter and the settings in the php.ini file accurately and correctly.
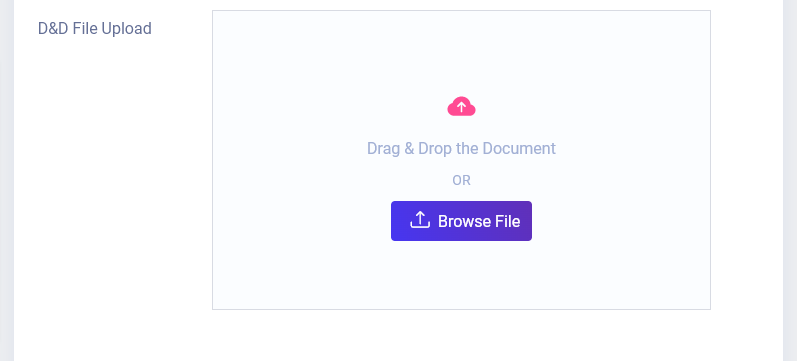
3. File Upload Vs Drag & Drop File Upload
Easy Form Builder is one of the best file upload plugins for WordPress. This plugin lets your customers upload a variety of file types to your forms.
In the free version, you can use the File Upload Field, which allows your customers to upload Zip files.
In the Pro version, your customers have the flexibility to upload various file types, including those supported by the File Upload Field, such as zip files (zip and rar), documents (doc, pdf…), images (jpg, png…), media (video and audio), or customized files. To ensure that your customers only upload files of these specific types in your form, utilize the Drag & Drop File Upload field.
4: Add Your File Upload Form to Your Website
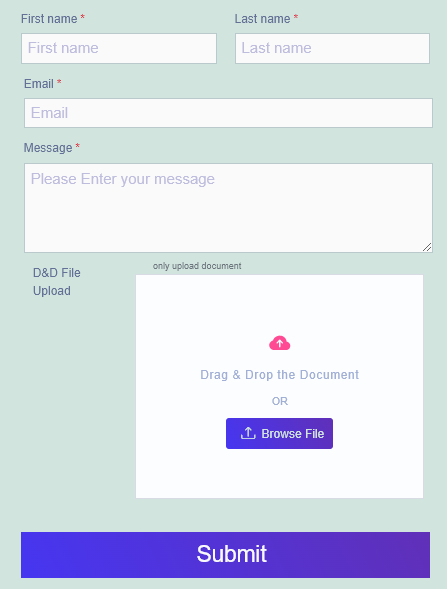
After you’ve created your form, you need to add it to your WordPress site.
To embed your file upload form on a page or post, create a new page or post in WordPress, or go to the update settings on an existing one. Click inside the first block (the blank area below your page title) and click on the “Add Easy Form Builder” icon.
The Easy Form Builder widget will appear inside your block. Click on the Easy Form Builder dropdown and pick the form you’ve already created that you want to insert into your page. Then, select your file upload form.
Next, click on the blue button in the top right that says either “Publish” or “Update,” so your form will appear on your website.
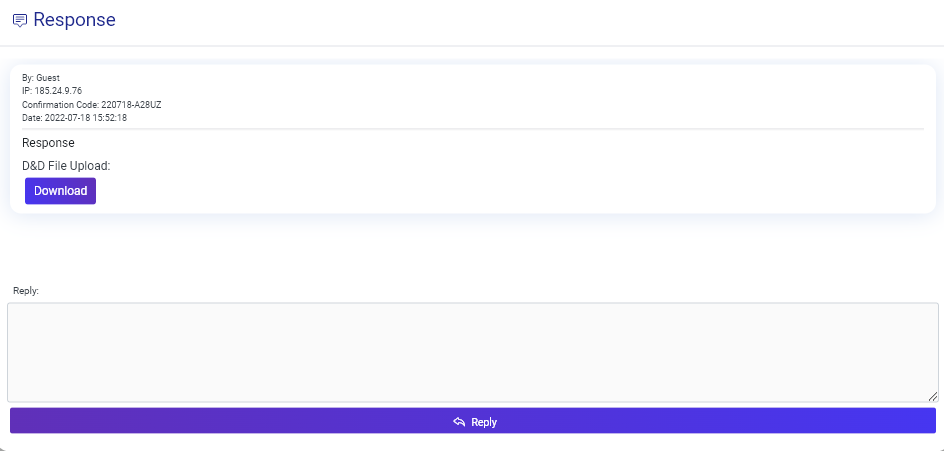
5. View the Uploaded Files in WordPress
Easy Form Builder stores each form submission as an entry. To view uploaded files, go to the Easy Form Builder » panel.

To download the file, right-click on the download button.
This is the easiest way to build a Drag & Drop file upload field in the form.
Notice:
Easy Form Builder utilize a sanitization algorithm to ensure that files with the specified extension are uploaded, thereby preventing the uploading of files intended for server attacks
Notice:
If your site is not on the https protocol and you are using the Chrome browser, you will have problems downloading files because Google has considered the allowed file download protocol for the https browser for security reasons. If you use the http protocol, download the files through the Firefox browser.