How to Create a Payment Form in Easy Form Builder?
Do you want to allow your users to make payments directly through your WordPress forms? With Easy Form Builder, you can create and customize payment forms in just a few steps!
Step 1: Add Your Payment Keys in Easy Form Builder
Before creating a payment form, make sure you have added your payment keys in Easy Form Builder.
Easy Form Builder supports both Stripe and PayPal, so you’ll need to add the correct API keys based on the payment method you want to use in your form.
If you’re not sure how to set this up, you can read one of the following tutorials:
Once your payment keys are added, you’ll be ready to create and use payment forms on your website.
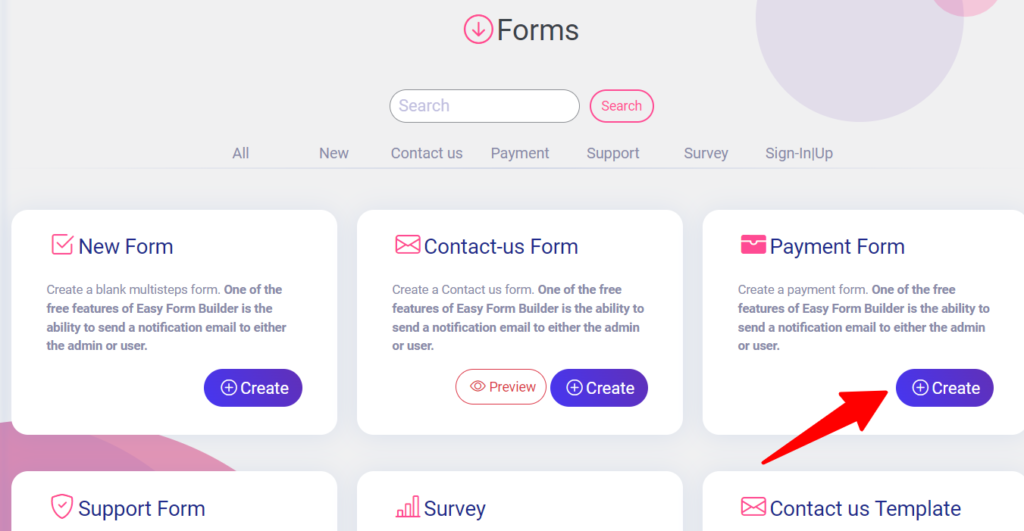
Step 2: Creating a Payment Form
To create a payment form in Easy Form Builder, start by selecting the payment form template.
Once you’ve selected the payment form template, you can add your product or service to the form by choosing one of the four payment field options: Payment Multi-Choose, Payment Single-Choose, Payment Selection Choose, or Payment Dropdown List.
When you select the settings icon for fields, you can enter product or service names and set prices in the fields settings window.

Next, you can customize the payment field by setting a name and price for your product or service. You can also choose your country’s currency in the Stripe settings.
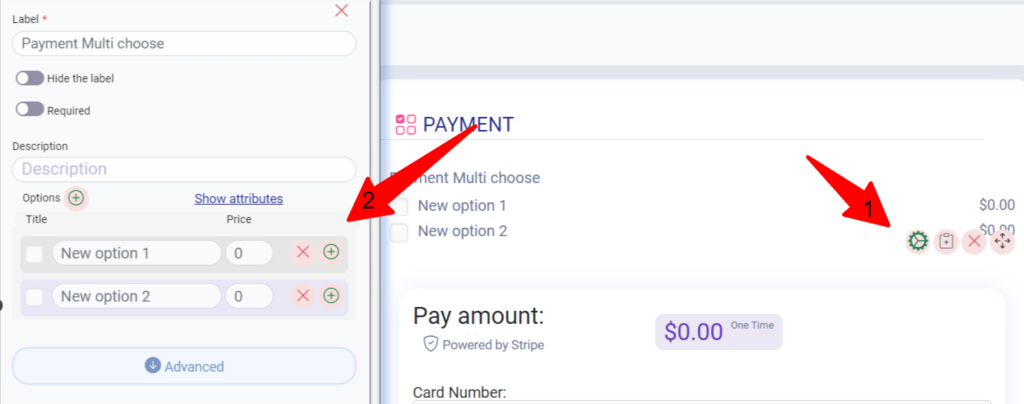
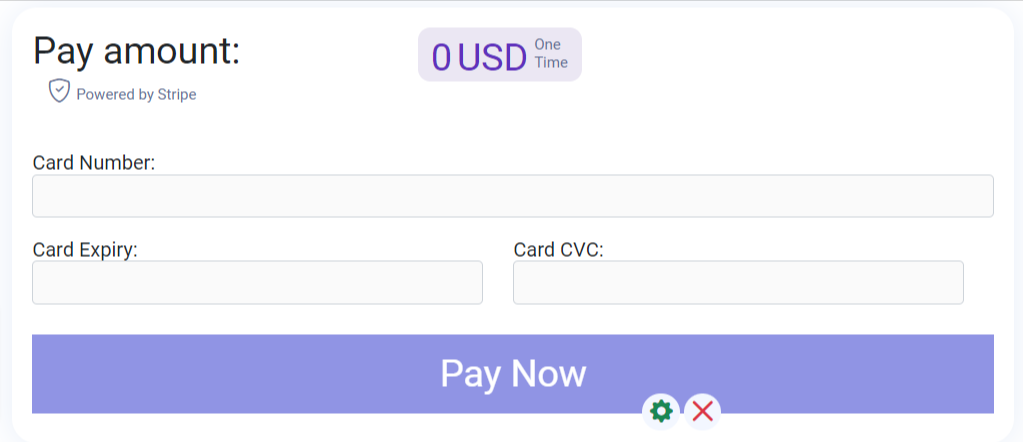
In the form builder, be sure to add the Stripe field or PayPal field to your form if you haven’t already. Just drag and drop it.
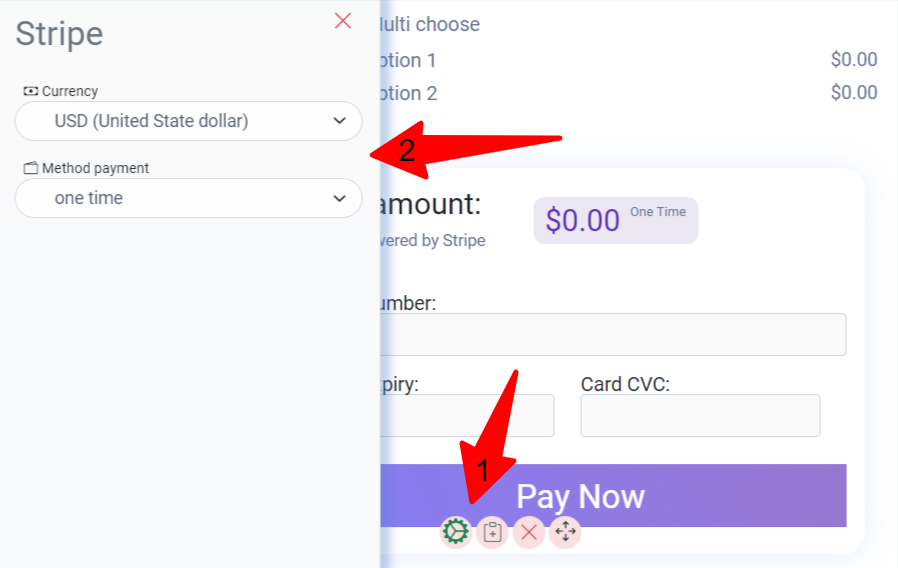
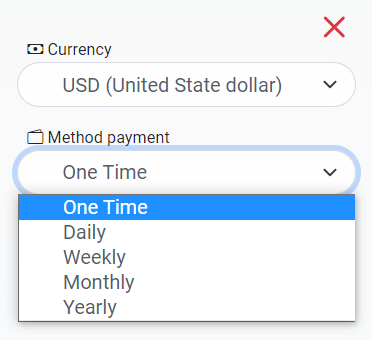
Select the icon of the setting in case you choose your country’s currency.
In stripe settings, you can choose your currency and method of payment like in the image below.
You have to save your form as shown in the image below.
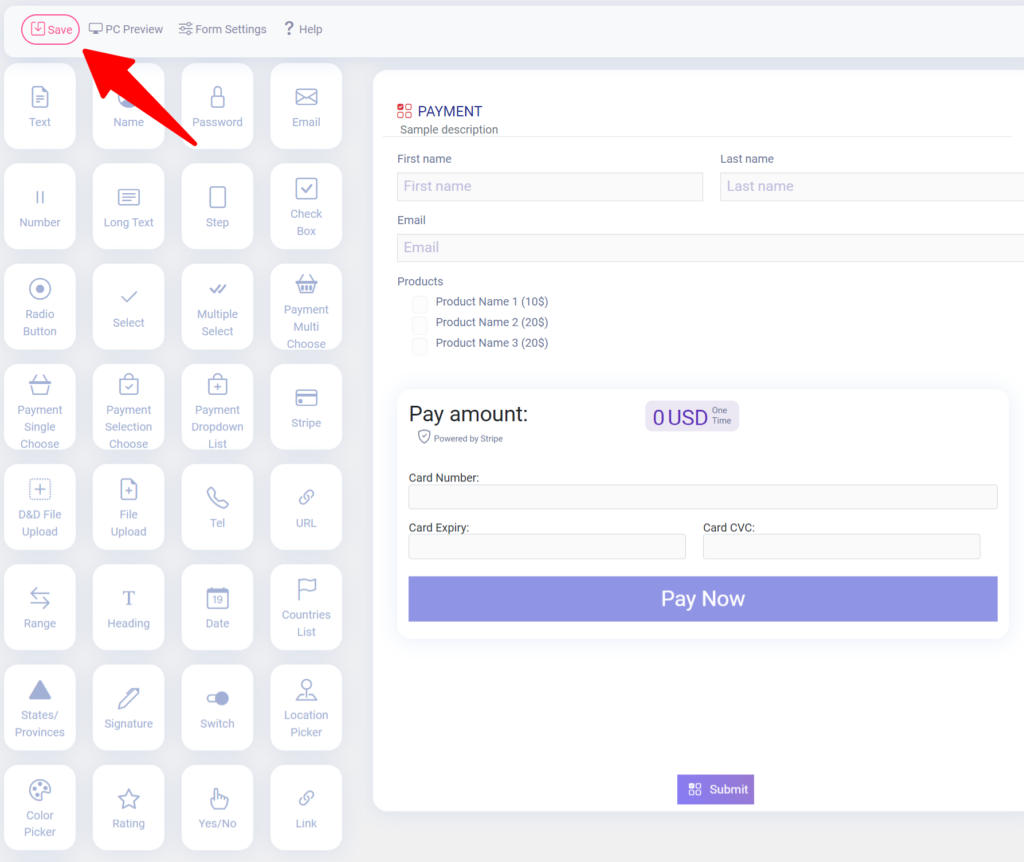
Your form saved successfully.
Step 3: Embedding the Form on Your Site
Once you’ve created your payment form, you can easily embed it on your site. Simply paste the shortcode into the content of your post or page where you want the form to appear.
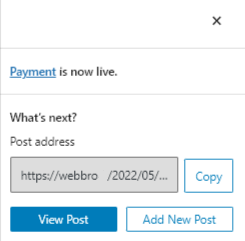
By clicking on the save button, your form will be ready to publish. You can then click “publish” to make the changes live on your site.
Once you’ve opened the page editor, you can add a new block by clicking the plus (+) icon in the upper left corner.
You are publishing your Form by past short-code in the content of the post or page.
When you click on the save button, your form is ready to publish, changes are live on the end of your site, and click “publish”.
By clicking on the view post you can find out your form.
After clicking on the view post button, you may observe your form. Here’s a sample of creating forms on Easy Form builder.
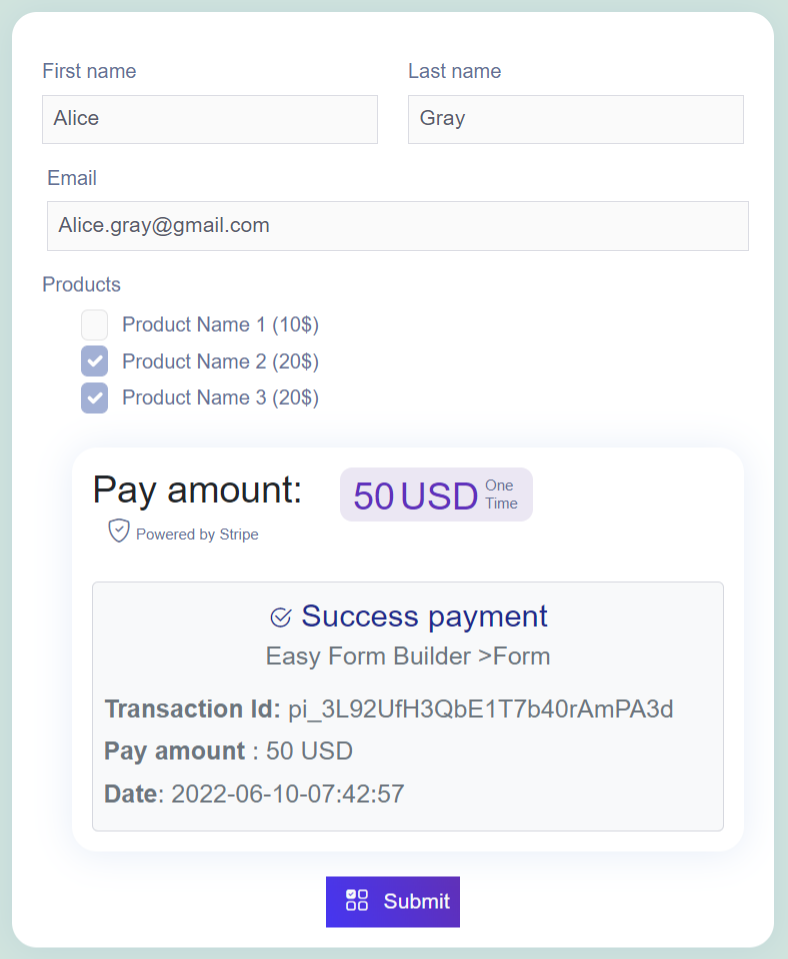
After your client paid, they have to send the form. That’s it. With Easy Form Builder, your job will be easier and faster.
Step 4: Testing Your Payment Form
We recommend testing your payment form before accepting actual payments. To test your form, submit an entry and follow the same steps as your users. You can set up the Test Mode of Stripe before adding your form to a live page to test transactions.
Step 5: Frequently Asked Questions
We’ve answered some of the most common questions we receive about using payment forms in Easy Form Builder. If you have any other questions or concerns, please don’t hesitate to contact our support team.
I’ve been using Easy Form Builder. How use payment forms?
you’ll need to complete two steps: Updated your site to the latest version of Easy Form Builder. Active pro version. Get Stripe keys Add stripe keys on Easy Form Builder > Panel > Setting > payment
How do I test Stripe payments in my forms?
We suggest testing out your forms to submit an entry and following the same steps as your users. We recommend setting up the Test Mode of Stripe before adding your form to a live page, which allows you to test transactions before accepting actual payments.
Does Easy Form Builder store my payment data?
Easy Form Builder does not store any sensitive payment data. In fact, our forms don’t even store sensitive credit card data on your site. Instead, the Stripe integration ensures that any sensitive information is communicated securely and directly to Stripe, without ever touching your server. This protects both you and your users from the potential risks associated.
How do I view purchase details in Stripe?
To access payment details in Stripe, open an individual entry for a payment form. In the response to forms, you’ll see a section titled Payment ID. Here, you can see the Payment ID of payment.
Will I be charged any fees for using Stripe in my forms?
Easy Form Builder does not charge a fee for using Stripe in your forms. However, Stripe charges its own fees based on your usage. For more details click here.
Are there any minimum and maximum charge amounts for payment forms?
As Stripe’s processing fee combines a small fixed amount and a percentage, we enforce a minimum amount when creating a charge. This ensures you don’t lose money on a charge. The minimum amount you can charge depends on which bank account settlement currency the payment would be paid out to. To check minimum charge amounts in your country’s currency click here.
Now You Can set up one-time payments for your forms in Easy Form Builder.
Conclusion:
With Easy Form Builder, creating payment forms and accepting payments on your website has never been easier. You can customize your payment form and embed it on your site in just a few steps. Plus, with Stripe integration, you can rest assured that any sensitive payment data is communicated securely and directly to Stripe. So why wait? Start using Easy Form Builder today and streamline your payment process!