How to Set Up Form Notification Emails in Easy Form Builder
Are you looking for a way to automatically send out emails when a user submits a form on your website? Easy Form Builder provides a simple solution to set up email notifications. In this step-by-step tutorial, we will guide you on how to set up email notifications in Easy Form Builder and ensure they are working properly.
- Setting Up Email Notifications
- Sending an Email Notification to the Admin of Forms
- Sending an Email Notification to the Person Who Filled Out the Form
- Testing Notification Emails
- Frequently Asked Questions
1. Setting Up Email Notifications
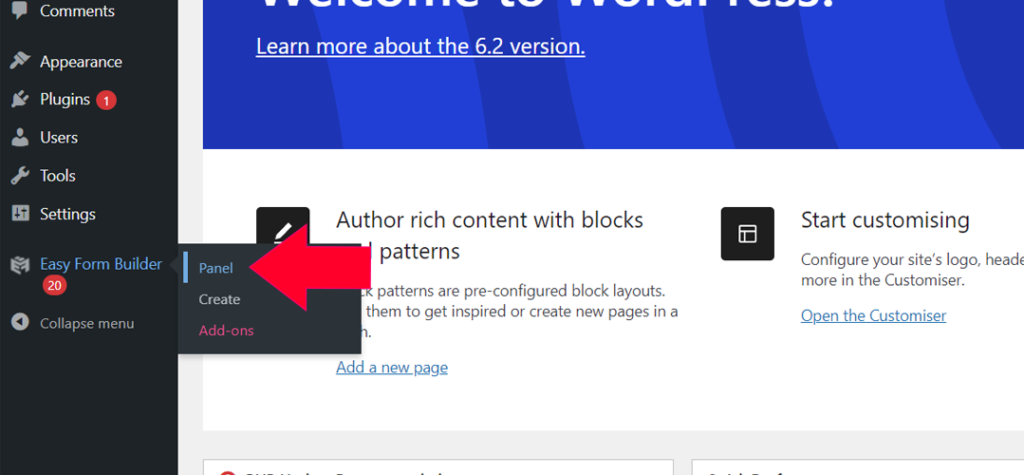
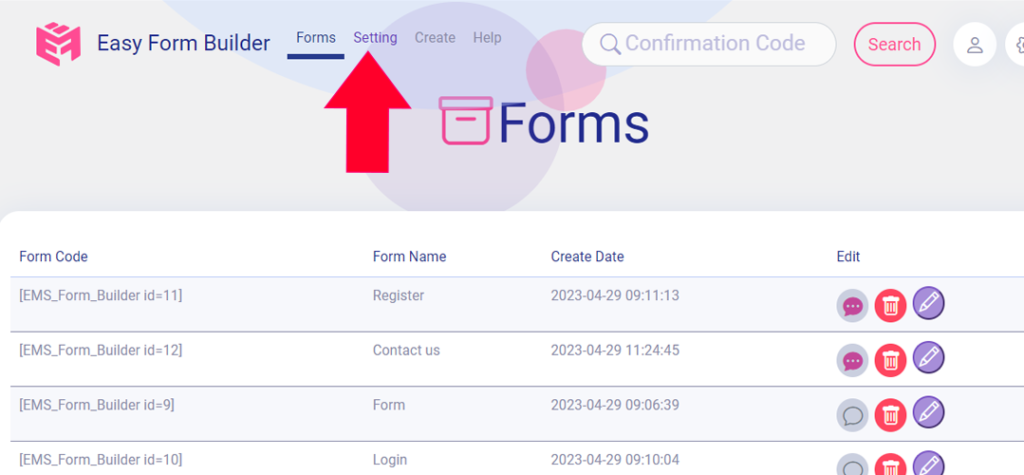
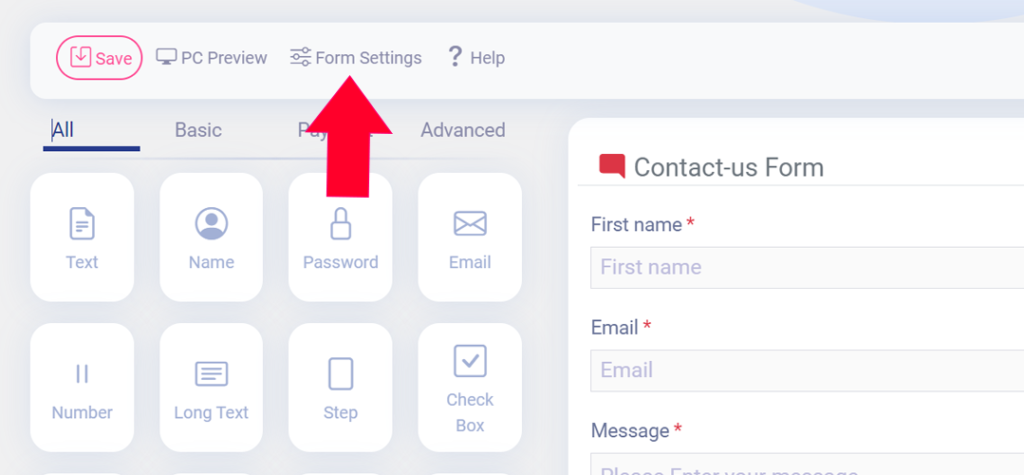
To get started, open the Easy Form Builder form builder and go to the panel page where you can access all the options for your form. In the Settings section, click on Email Settings to access the email settings of Easy Form Builder.
Once in the Email Settings, enter your email address and click the Click to Check Email Server button. If you use a host server as an email server, there is a possibility that the email will go to the spam box. In this case, you may need to install and activate WP Mail SMTP.
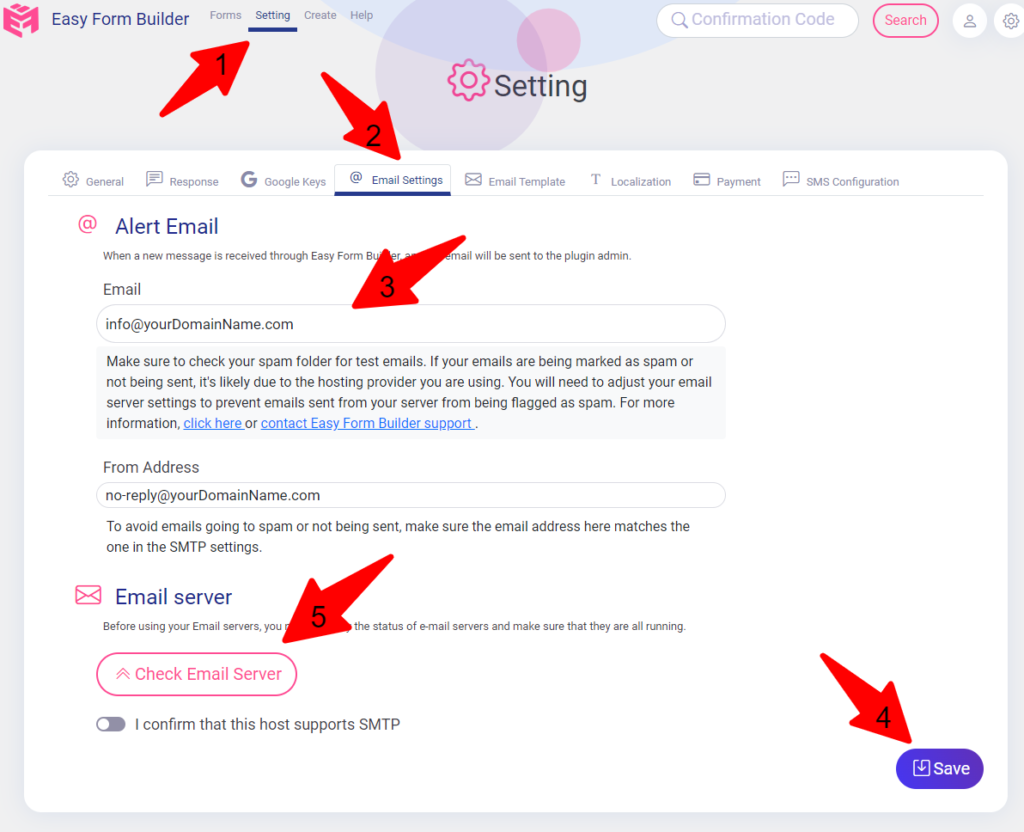
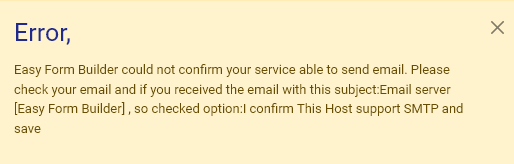
After checking your email server, you will receive an email from the Easy Form Builder plugin. This email confirms that your host can send emails. If you did not receive the email, your server/host does not support sending emails. Once you have received the email, click on the Save button.
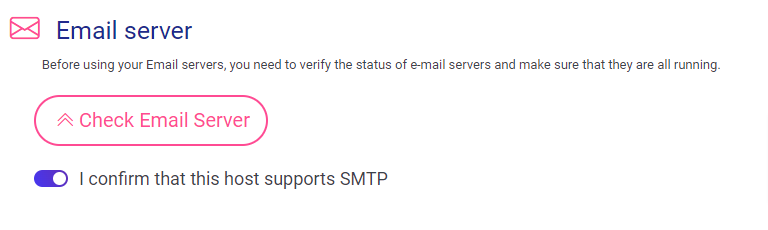
Note: If you receive a message stating “Error” check your email inbox and look for an email with that subject line. In cases where emails are sent to spam, it is usually due to issues with your hosting provider. However, if you have received an email confirming that your host supports and stores SMTP, you can proceed to select the save button to complete the setup process. This ensures that your email notifications will be sent successfully.
2. Sending an Email Notification to the Admin of Forms
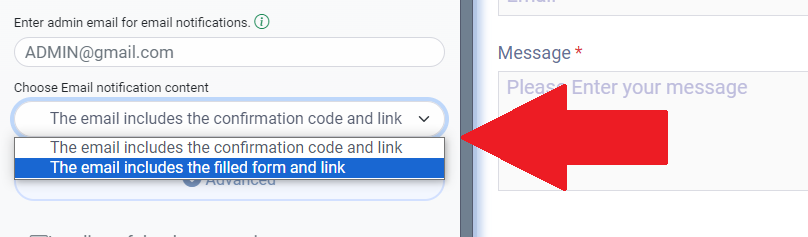
To set up this feature, enable it in the form set up section. In the Create Form section, insert your email address to receive notifications whenever your forms are filled out by your clients.
Note: You can enter multiple emails as the form admin’s email and separate them with commas (e.g. “[email protected] , [email protected]”)

Note: If you want the filled form content to be sent to the admin’s email, select “The email includes the filled form and link” from the “Choose Email notification content” selector. Otherwise, by default, the email content will include a tracking code and a link to the message sent to the admin for the form.
3. Sending an Email Notification to the Person Who Filled Out the Form
To notify the user who filled out the form, you need to add the email option into your form and enable email notifications. Drag and drop the email option into your form, and click on the email settings. In this position, simply click on the enable email notification button and save the form.
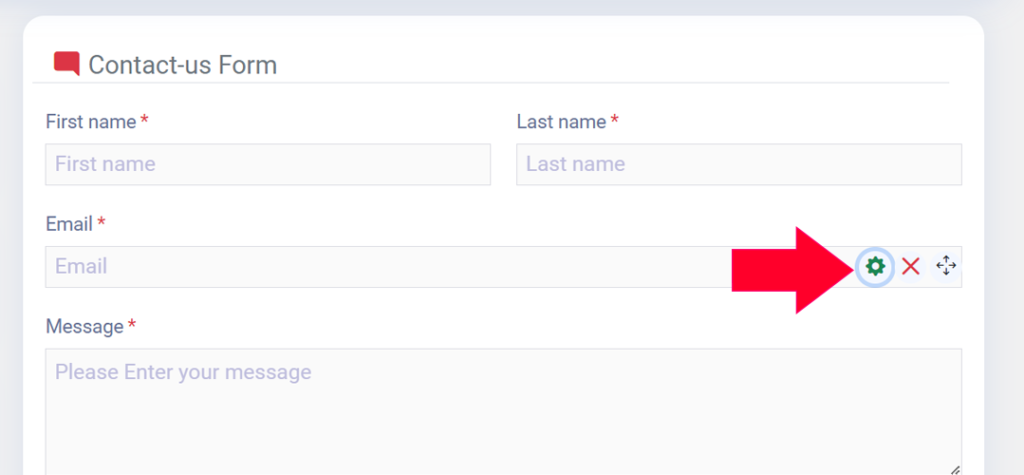
In this position simply click on the enable email notification button.
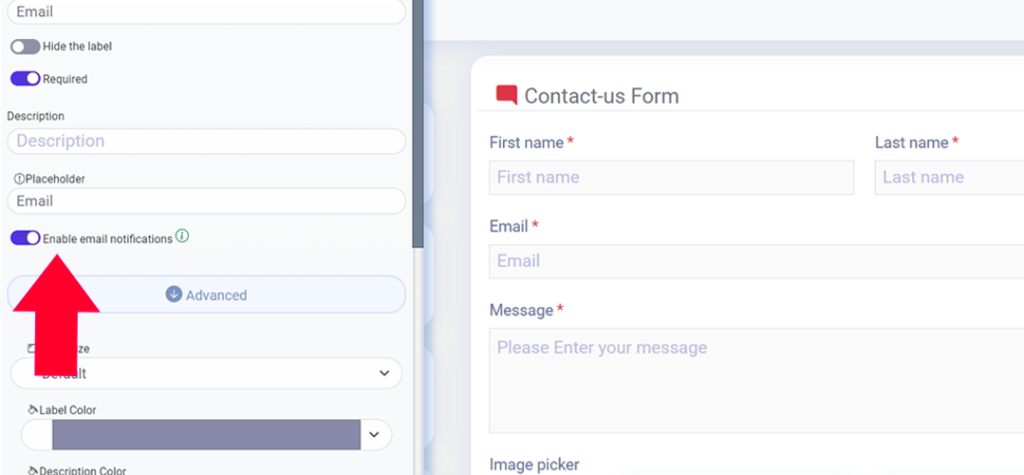
And save the form.
Note: To respond to the customer’s filled form, the admin of the form should proceed through the Easy Form Builder panel to respond to a filled form. A new email notification will be sent to the customer who filled out the form.
4. Testing Notification Emails
Once you have configured your notification settings, it is important to test them to ensure they are working correctly. Check your inbox for new messages and make sure they are not being filtered out by your spam folder. If your notifications are not being delivered, you may need to install and activate WP Mail SMTP.
5. Frequently Asked Questions
Why am I not receiving my notification emails?
If you are not receiving your notification emails, first make sure that you have configured everything correctly. If your settings look correct, the issue may be that emails sent from WordPress are not authenticated by default, unlike emails sent from dedicated email service providers. As a result, they are often filtered out by the receiving mail server and not delivered. For more information and SMTP settings for email delivery, click here.
In conclusion, setting up email notifications in Easy Form Builder is a straightforward process that can save you time and hassle. By following these steps, you can ensure that your notifications are being delivered and that your users are informed when their form is submitted.