Short answer: Easy WP SMTP is a free WordPress plugin that sends every WordPress email through a real email service instead of your host’s mail server. Install it, open its Setup Wizard, choose a mailer such as SMTP2GO or Brevo, paste the API key, set a From Email on your own domain with Force From Email switched on, and send a test. Easy Form Builder needs no change: its form emails go through Easy WP SMTP automatically.
If the Easy Form Builder email test said No email arrived, or your form emails keep landing in spam, an SMTP plugin is the quickest fix that does not need a DNS panel. This guide follows the plugin screen by screen, with the version we tested (Easy WP SMTP 2.15.1).
Easy WP SMTP is a separate plugin, not part of Easy Form Builder. It is made by the Easy WP SMTP team (a SendLayer product); its settings, its Pro version and its support are theirs. Easy Form Builder only opens WordPress’s own installer for it. Your forms do not change: Easy Form Builder keeps writing the emails, and WordPress hands them to Easy WP SMTP instead of to your host.
The video above shows the whole setup in about two minutes. The plugin’s own written guide is Using the Setup Wizard.
Before you start
You need three things:
- An administrator account in WordPress. Only administrators can install plugins.
- One sending account. Either a free account with an email service (SMTP2GO, Brevo, Mailjet, Postmark and others), or the SMTP details of a mailbox you already have, for example
[email protected]at your host. - About 10 minutes.
Only one plugin on your site should change how WordPress sends email. If you already use WP Mail SMTP, FluentSMTP, Post SMTP or a service’s own plugin (Brevo, SMTP2GO, Mailjet, Postmark), keep that one or deactivate it before you set up Easy WP SMTP.
Step 1 — install and activate Easy WP SMTP
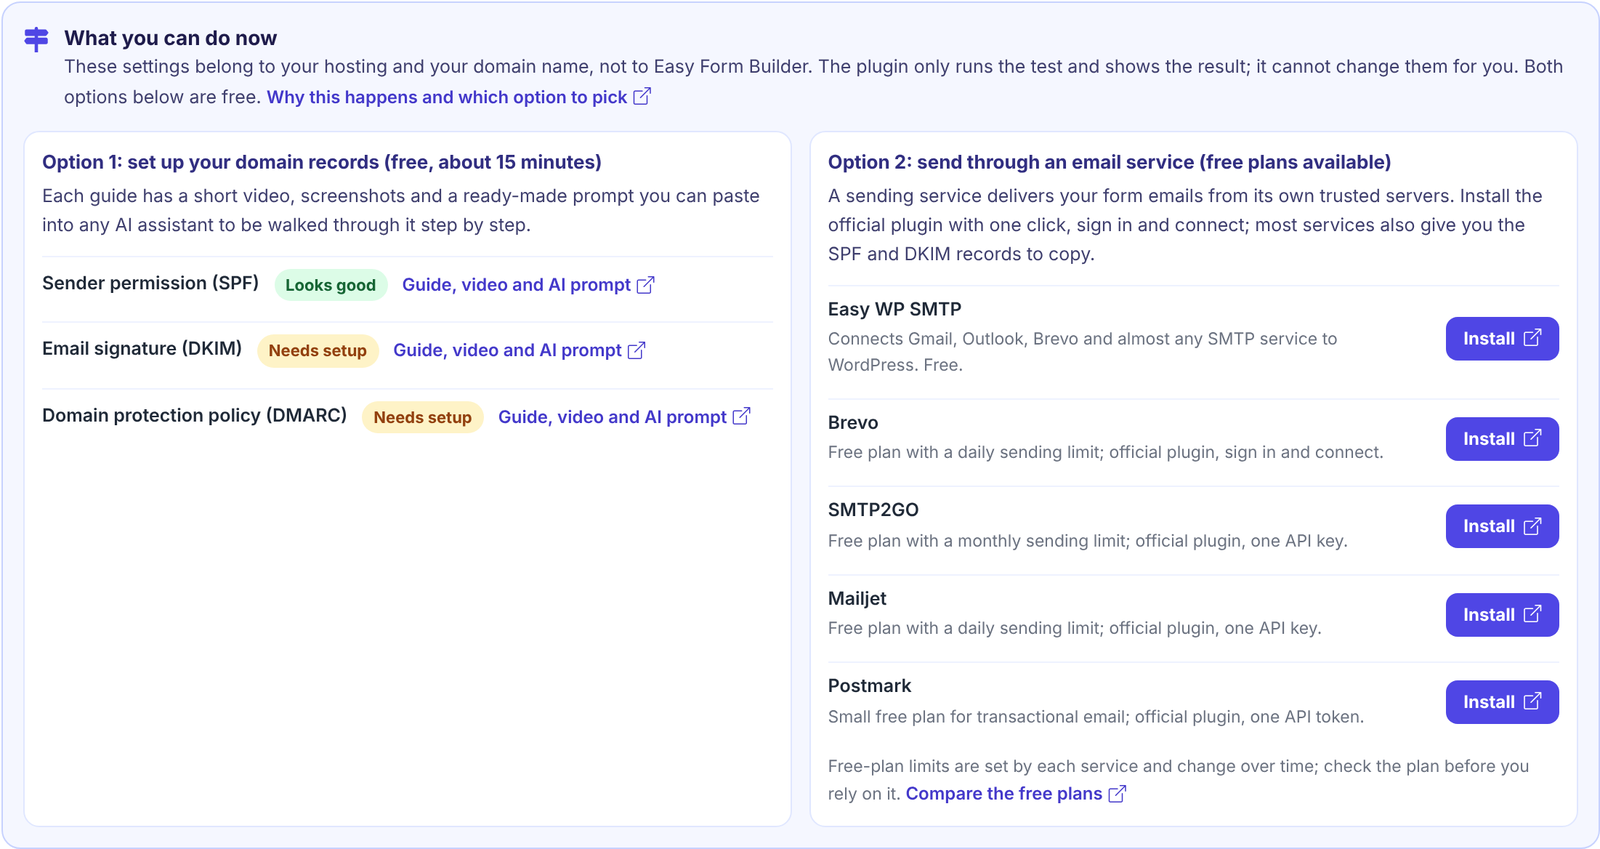
In the Easy Form Builder email test result, under Option 2, press Install next to Easy WP SMTP. A new tab opens with WordPress’s own page for the plugin. Press Install Now at the bottom right, wait a few seconds, then press Activate.
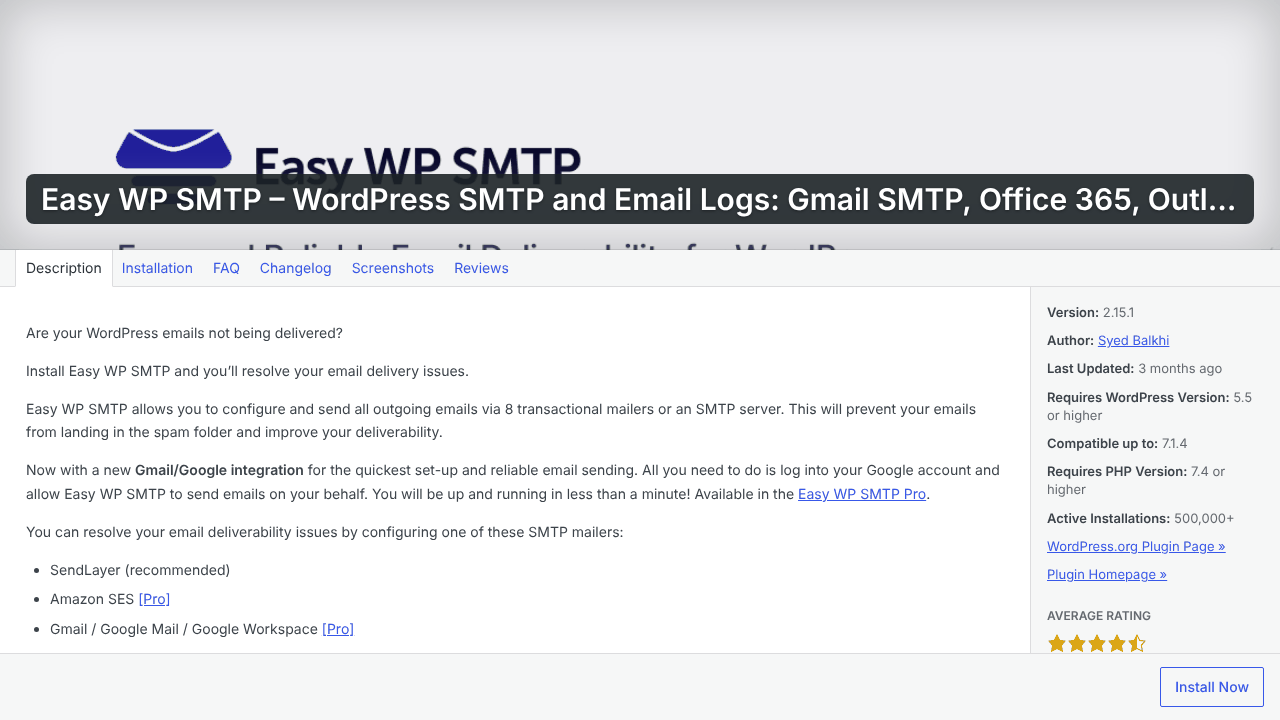
You can also install it from Plugins → Add Plugin: search for Easy WP SMTP, then Install Now and Activate. The right plugin lists Syed Balkhi as its author on wordpress.org and has more than 500,000 active installations.
The first time you activate Easy WP SMTP on a site, its Setup Wizard opens by itself. Press Let’s Get Started.
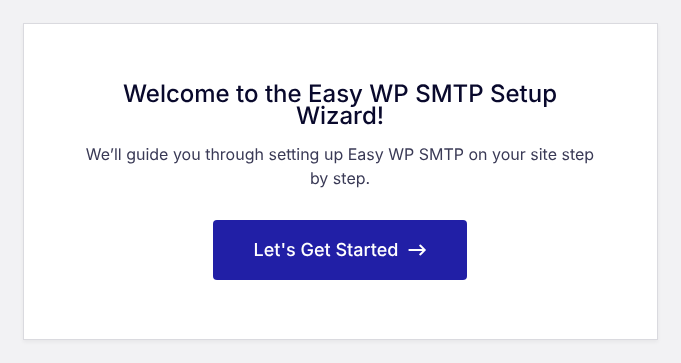
Wizard did not open, or you closed it? Open Easy WP SMTP → Settings and click the Setup Wizard link below Mailer Settings.
Step 2 — choose your mailer
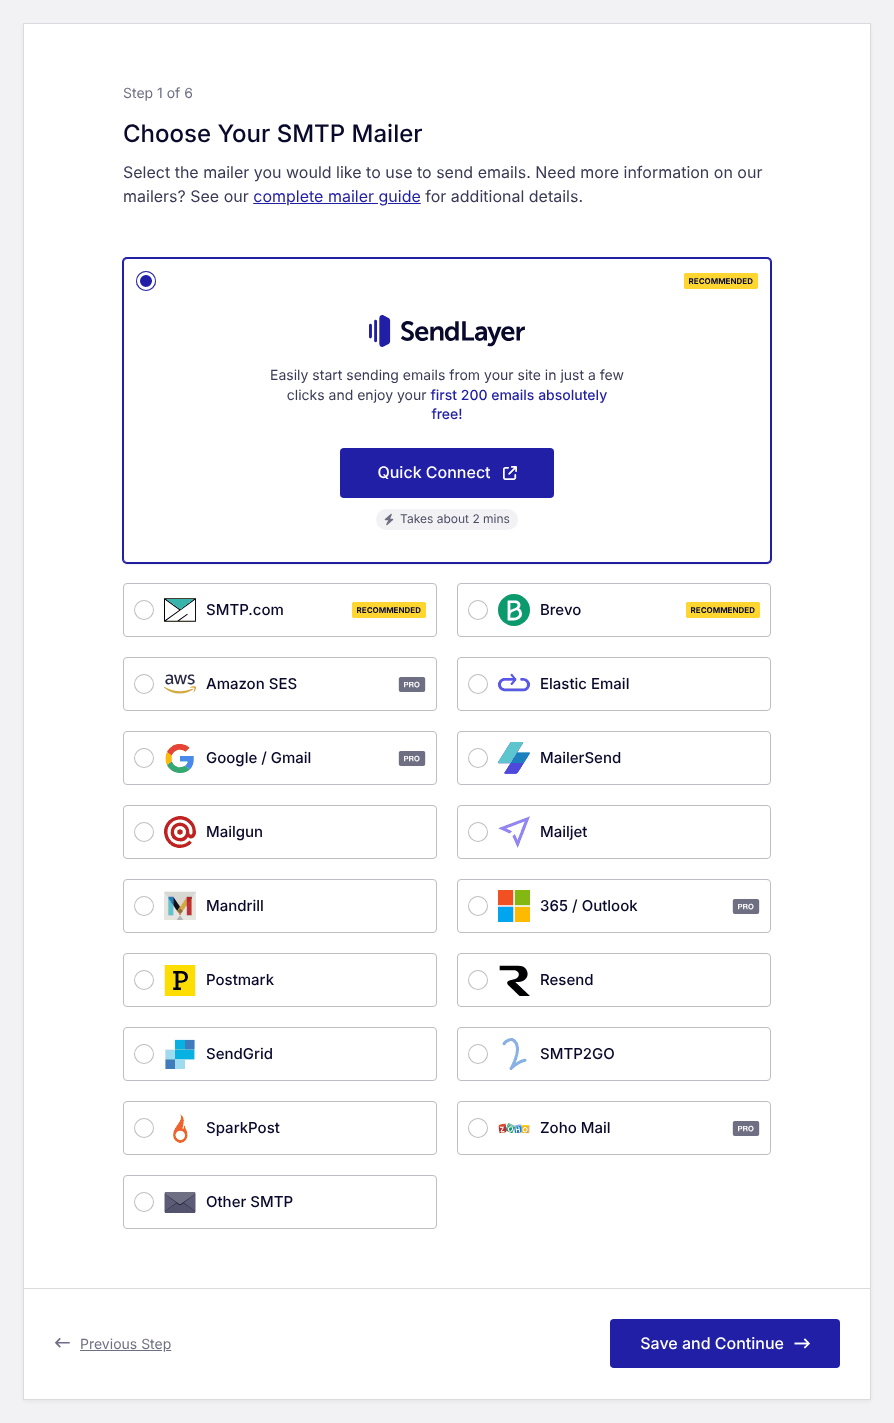
The first wizard screen, Choose Your SMTP Mailer, lists the services Easy WP SMTP can send through. Mailers with a PRO badge (Amazon SES, Google / Gmail, Outlook / 365 and Zoho Mail) need the paid Easy WP SMTP Pro. All the others work in the free plugin.
| Your situation | Choose | What you will paste |
|---|---|---|
| You want the simplest free route | SMTP2GO or Brevo | One API key |
| You already use Mailjet, Postmark, SendGrid, Mailgun or another listed service | That service | Its API key (Mailjet: API key and secret key; Mailgun: API key, sending domain and region) |
| You want to send from a mailbox at your host | Other SMTP | The mailbox’s SMTP host, port, username and password |
| You send from a Gmail address | Other SMTP with a Google app password (free), or Google / Gmail (Pro) | smtp.gmail.com and an app password |
| You use Outlook or Microsoft 365 | Outlook / 365 (Pro), or a free service from the first row | Pro: sign in with Microsoft |
SendLayer is the wizard’s own recommendation, with a Quick Connect button. As the wizard says, it gives you your first 200 emails free; after that it is a paid service. For a contact form, the free plans of SMTP2GO or Brevo usually last for good.
Select your mailer and press Save and Continue.
Step 3 — connect the service (example: SMTP2GO)
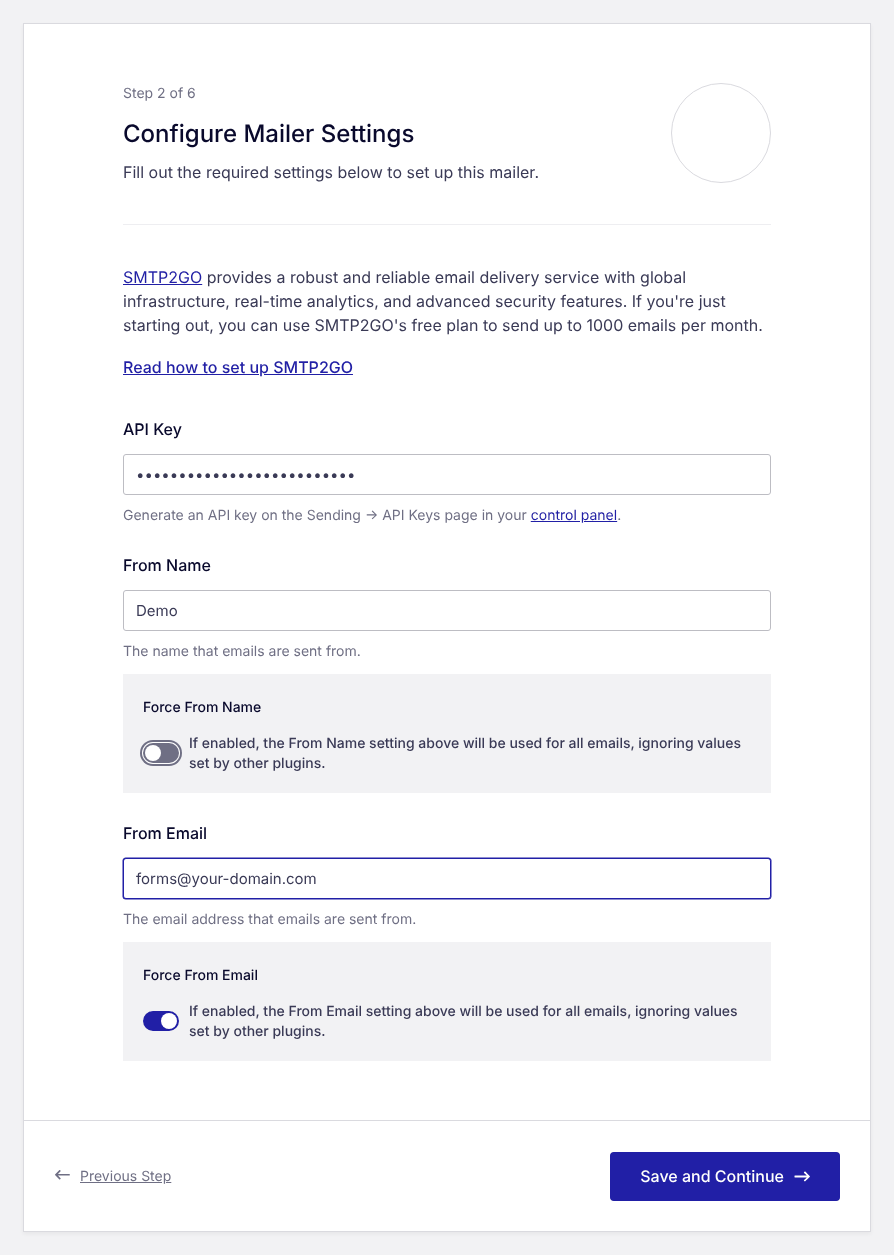
- Create a free account at smtp2go.com and verify your sending domain there (Sending → Verified Senders). Verify the whole domain, not only one address: Easy Form Builder’s own email test sends from another address on your domain (see Step 6).
- In SMTP2GO, open Sending → API Keys, create a key and copy it. The wizard points to the same page: “Generate an API key on the Sending → API Keys page in your control panel.”
- Back in the wizard, paste it into API Key.
- From Name: your site or business name, as people should see it in their inbox.
- From Email: an address on the domain you verified, such as
[email protected]. - Leave Force From Email switched on (it is on by default). It makes WordPress’s emails, Easy Form Builder’s form emails included, use this From Email.
- Press Save and Continue.
The other API mailers work the same way. For Brevo, create the key in Brevo under SMTP & API → API keys; for Postmark, copy the Server API token and verify your whole domain in Postmark, not only a single sender signature.
Using a mailbox you already have (Other SMTP)
Choose Other SMTP in Step 2. The wizard then asks for your mailbox’s server details:
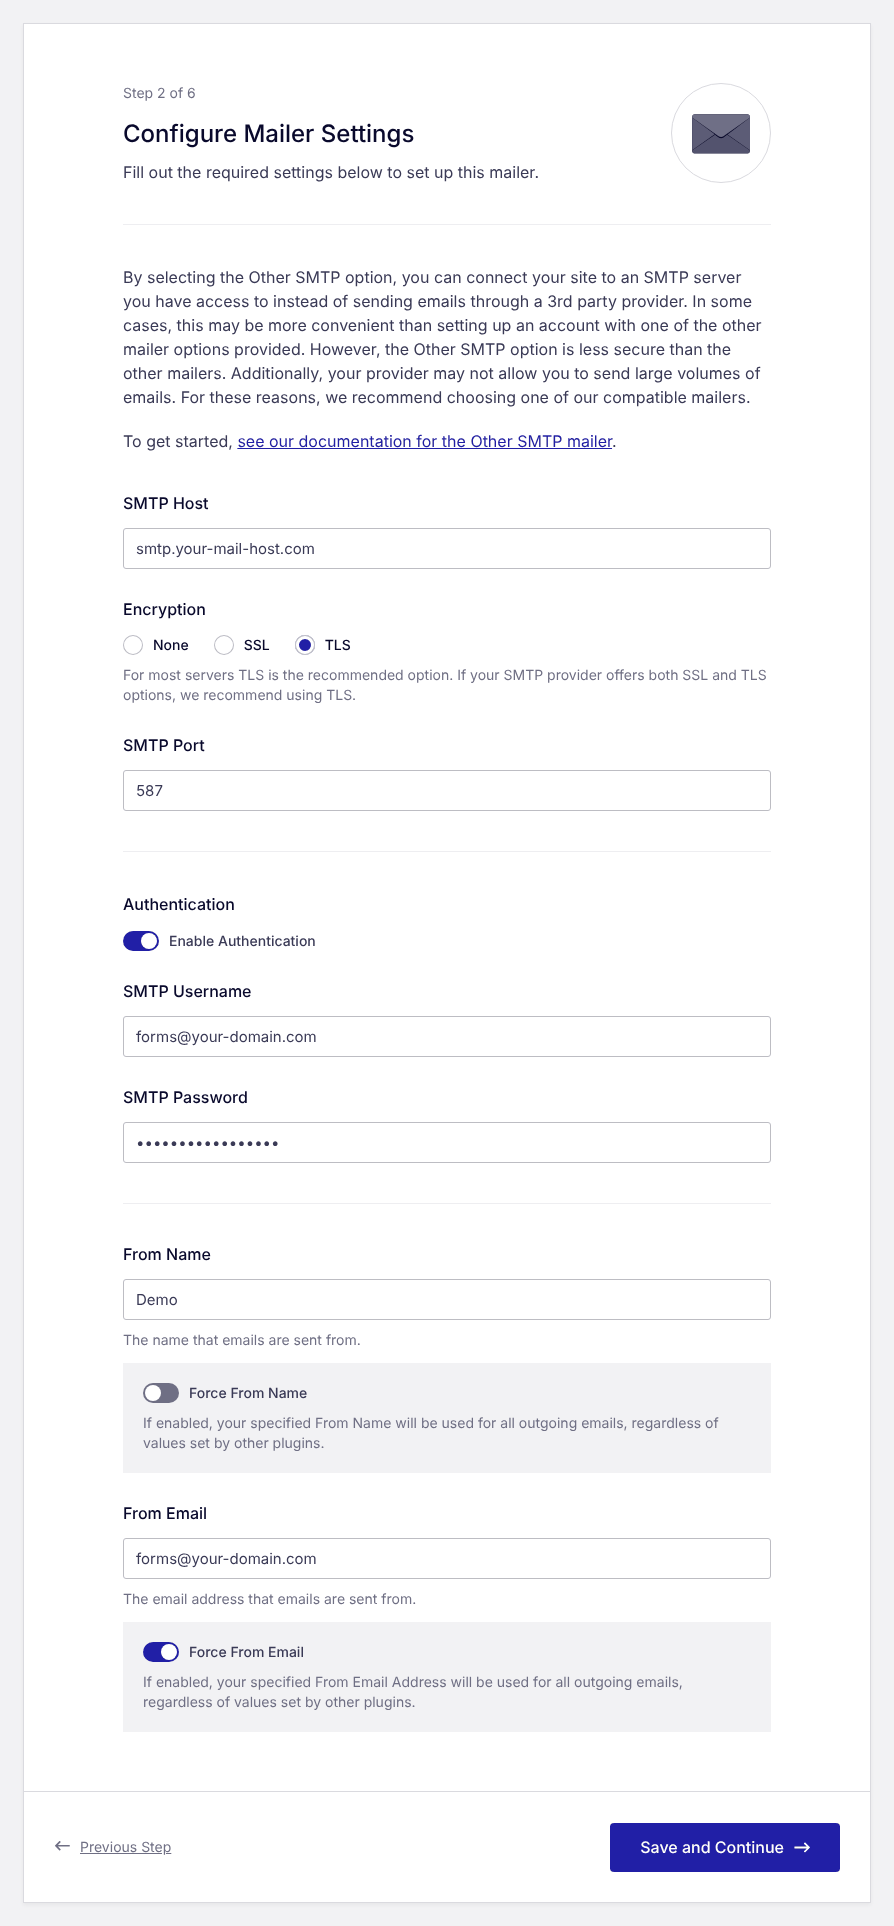
- SMTP Host — your provider’s outgoing mail server, for example
smtp.your-mail-host.com. - Encryption — TLS for most servers (the wizard recommends it), with SMTP Port
587. SSL uses port465. - Authentication — leave it switched on.
- SMTP Username — usually the full email address.
- SMTP Password — the mailbox password, or an app password if your provider uses them.
- From Email — the same mailbox address, with Force From Email switched on.
Your host’s help pages usually list these values under “SMTP settings” or “email client settings”. If you cannot find them, ask your host’s support for: SMTP Host, Encryption, SMTP Port, Authentication, SMTP Username and SMTP Password.
Gmail with the free plugin: use host smtp.gmail.com, TLS, port 587, your full Gmail address as username and a Google app password as the password. Your normal Google password does not work here. App passwords need 2-Step Verification, and some Google Workspace accounts do not offer them; in that case use a free service instead.
Two notes from the Easy WP SMTP documentation for Other SMTP: it stores your mailbox login in WordPress, where other administrators can see it, which is why an API mailer is the safer choice; and some hosts block SMTP ports, in which case your host has to help.
Step 4 — finish the wizard
Three short screens follow:
- Which email features do you want to enable? Untick Smart Contact Form. It is ticked by default, and the wizard would then install and activate WPForms, a second form plugin; your forms already come from Easy Form Builder. Leave the other options as they are (those marked Pro need Easy WP SMTP Pro).
- Help Us Improve Easy WP SMTP asks whether you want to share usage data. Your choice.
- The license key screen. The free plugin says “no license key required”; just continue.

On the last screen the wizard checks your mailer in the background by trying to send a test email. When it says Congrats, you’ve successfully set up Easy WP SMTP, the connection works. If it reports a problem instead, it links to troubleshooting steps; the usual causes are listed in Step 5.
Step 5 — send a test email
Open Easy WP SMTP → Send a Test. Type your own address in Send To and press Send Test Email.

This is the same check the wizard ran, and you can repeat it whenever you change a setting. If the test fails, Easy WP SMTP shows the error on that page. The usual causes are a mistyped API key, a From Email that the service has not verified yet, or a host that blocks SMTP ports (Other SMTP only).
Step 6 — check the result in Easy Form Builder
Go back to Easy Form Builder → Settings → Email Settings and press Check Email Server. The test email now leaves through your service. It is sent from Easy Form Builder’s own From Address (in the free version no-reply@ followed by your domain), even when Force From Email is on, so your service must accept that address. With your whole domain verified at the service, it does.
With Other SMTP (a mailbox at your host, or Gmail) there is no domain to verify: the mail server may refuse the test’s no-reply@ sender, and Gmail replaces it with your Gmail address. In Easy Form Builder Pro, set the From Address to the mailbox address (see below). In the free version, if Send a Test in Easy WP SMTP succeeds but Check Email Server fails or shows another sender, the test’s no-reply@ sender is the cause: your form emails still go out, because Force From Email gives them the mailbox address.
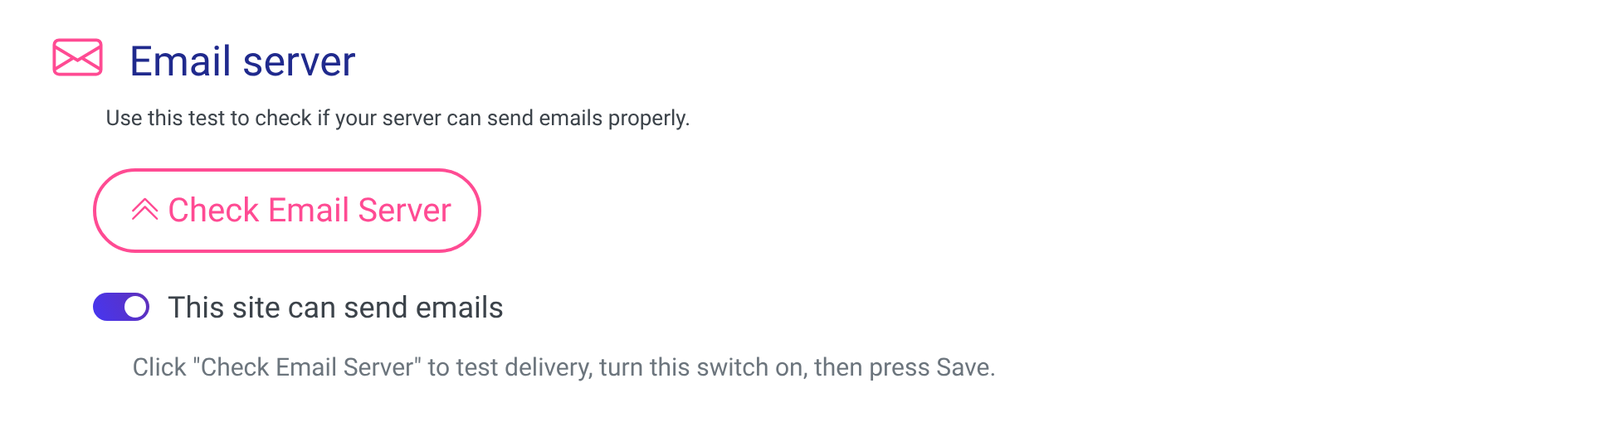
The email should now arrive. For the best score, add the SPF and DKIM records that your service shows on its domain authentication page, then a DMARC record. Each guide takes about 15 minutes:
About the From address in Easy Form Builder: in Easy Form Builder Pro, set Easy Form Builder → Settings → Email Settings → From Address to the same address as the From Email in Easy WP SMTP. In the free version that field is a Pro feature, and form emails are written with no-reply@ and your site’s domain; Force From Email in Easy WP SMTP replaces it with your verified address in every form email, so keep it switched on. The Check Email Server test is the one exception (see above).
Frequently asked questions
Do I need to change anything in Easy Form Builder? No. Easy Form Builder sends through WordPress, and Easy WP SMTP takes over WordPress’s sending. Every form email, notification and confirmation goes through your service automatically. If the service refuses an email (a wrong API key, an unverified sender), that email does not go out through the service: the notification and confirmation emails of a form submission are then not delivered at all, and Easy Form Builder sends only a few others, such as its password recovery email, again through your host’s mail server, where they may land in spam. So after every change, run Easy WP SMTP’s Send a Test; it shows the real error.
Does pressing Install in Easy Form Builder connect the service by itself? No. Install opens WordPress’s installer; after Install Now and Activate, you connect the service once in the Easy WP SMTP Setup Wizard.
Is Easy WP SMTP free? Yes. The free plugin covers every mailer without a PRO badge, including Other SMTP. Easy WP SMTP Pro adds Gmail and Outlook sign-in, a full email log, alerts and more. The sending services have their own free plans and limits; check their pricing pages.
Can I keep WP Mail SMTP or another SMTP plugin as well? Keep only one. Two plugins that change how WordPress sends email override each other, and the result is hard to predict.
My emails still go to spam. Check that Force From Email is on and that the From Email is verified at your service. Then add the SPF, DKIM and DMARC records from the guides above. Why form emails go to spam explains the background.
How do I remove Easy WP SMTP completely? In Easy WP SMTP → Settings, open the Misc tab, switch on the uninstall option that removes all plugin data, and save. Then deactivate and delete the plugin under Plugins.
Ready-made prompt for any AI assistant
[My details — replace]
My domain: example.com
Mailer I want to use in Easy WP SMTP (or "help me choose"): SMTP2GO / Brevo / Other SMTP (my host's mailbox) / Gmail
Other SMTP plugins active on my site (WP Mail SMTP, FluentSMTP…): none / …
Do I use Easy Form Builder Pro? yes / no

[Instructions — do not change]
You are helping a non-technical WordPress site owner set up the free Easy WP SMTP plugin
(version 2.15 or later) so the emails of their forms (Easy Form Builder) are delivered.
1. If another SMTP plugin is active, tell me to keep only one before anything else.
2. If I asked you to choose, pick one mailer that works in the free plugin and say why in two sentences.
3. Walk me through the Easy WP SMTP Setup Wizard one screen at a time: Choose Your SMTP Mailer,
   then the mailer settings (where to find the API key at the service, or for Other SMTP the host,
   encryption, port, username and password), From Email on my own domain with Force From Email on.
   On the features screen, tell me to untick Smart Contact Form (it would install WPForms).
   Ask me what I see before moving on.
4. Then: Easy WP SMTP → Send a Test. If it fails, help me read the error message.
5. If I use Easy Form Builder Pro, tell me to set Easy Form Builder → Settings → Email Settings →
   From Address to the same address. Tell me to verify my whole domain at the service, because
   Easy Form Builder's Check Email Server test sends from its own From Address (no-reply@ my domain
   in the free version). With Other SMTP (a host mailbox or Gmail) there is no domain to verify:
   tell me that Check Email Server may then fail or show another sender while my form emails still
   go out, and that in Easy Form Builder Pro I should set the From Address to the mailbox address.
   End with how to re-run Check Email Server and where my service shows the
   SPF and DKIM records for my domain.