🛡️ Protecting Your WordPress Forms: How to Add Google reCAPTCHA in Easy Form Builder
If you’re running a WordPress website, chances are you’ve dealt with spam form submissions at some point. Whether it’s fake leads, bots filling out contact forms, or unwanted messages — spam is frustrating.
Thankfully, Easy Form Builder, a lightweight and user-friendly WordPress form plugin, makes it simple to prevent spam using Google reCAPTCHA.
In this guide, we’ll walk you through how to set up Google reCAPTCHA on your forms using Easy Form Builder — step by step, with no code needed.
Why Add Google reCAPTCHA to Your WordPress Forms?
Adding reCAPTCHA helps you:
- 🧠 Identify real users vs bots
- ❌ Block automated spam submissions
- ✅ Improve form reliability and data quality
- 🔒 Boost trust and security for visitors filling out forms
It’s especially useful on contact forms, login forms, registration pages.
🔧 Step 1: Get Google reCAPTCHA Site Key and Secret
- Head to the Google reCAPTCHA Admin Console
- Log in with your Google account
- Register your website (choose v2)
- Add your domain name and accept the terms
- Once done, Google will give you two keys:
- Site Key
- Secret Key
💡 Keep these keys ready — you’ll use them inside the form settings later.
🔧 Step 2: Paste reCAPTCHA Keys into Easy Form Builder Settings
Now that you have the keys, let’s configure Easy Form Builder.
- In your WordPress dashboard, go to Easy Form Builder
- From the top menu, click on Settings
- Navigate to the Google Keys tab
- Paste the Site Key and Secret Key into the designated fields
- Click Save Settings
This links your WordPress site to Google reCAPTCHA and prepares your plugin to use spam protection in any form you build.
📋 Step 3: Create a Form in Easy Form Builder
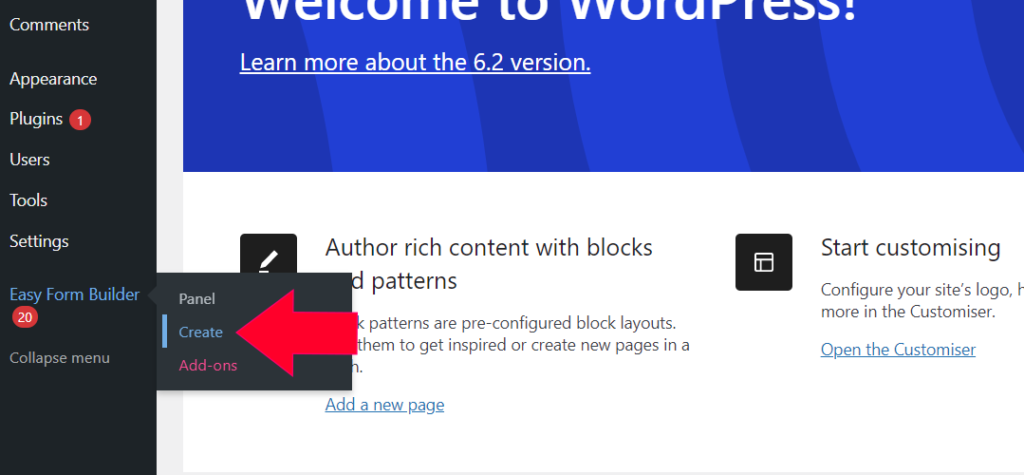
- From your WordPress dashboard, go to Easy Form Builder > Create Form
- Choose a template like Contact Us, Support Request, or build from scratch
- Use the drag-and-drop builder to add fields like:
- Name
- Phone
- Location
- Password
The builder is fully visual — no need to write code or configure complex settings.
First, make sure you’ve installed and activated Easy Form Builder on your WordPress site. Then, log into your WordPress admin area and go to the Forms Overview page. Click on the create button in the sidebar to start a new form.
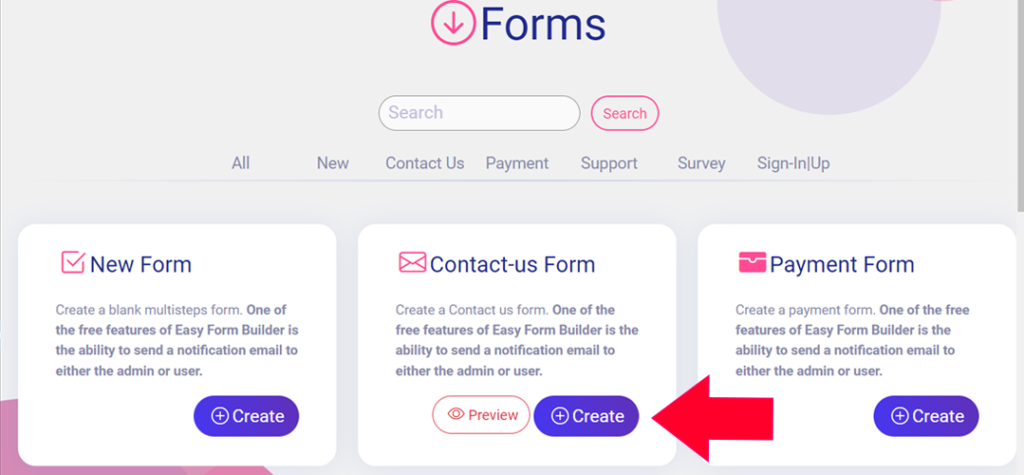
Choose the type of form you need, such as a contact-us form, and drag and drop the required fields to your form, such as Telephone number, Signature, Location Picker, E-mail, and Password.
🔐 Step 4: Add Google reCAPTCHA to Your Form
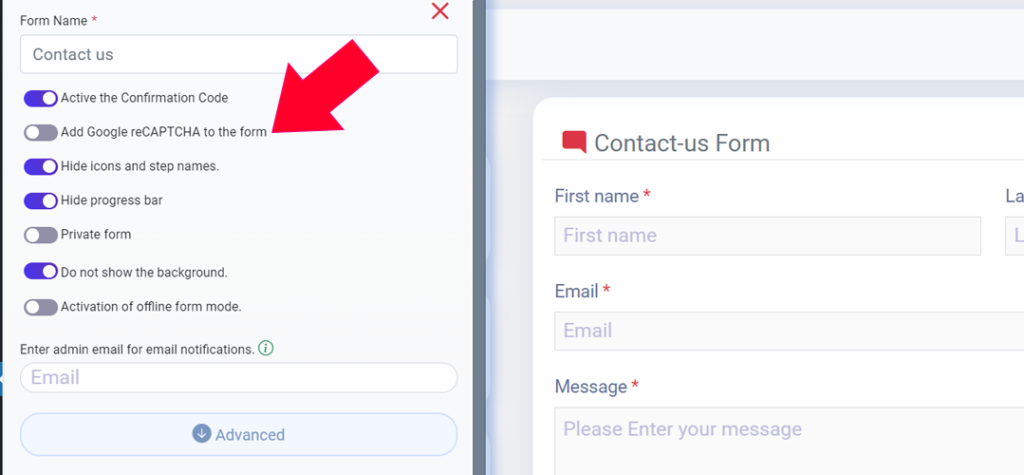
Once you’ve built your form:
- Open Form Settings
- Scroll down and active “Add Google reCAPTCHA”
- Click Save Form
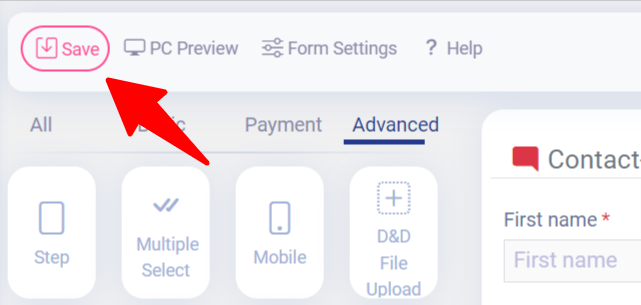
✅ You’ll see a success message like:
“Form saved successfully”
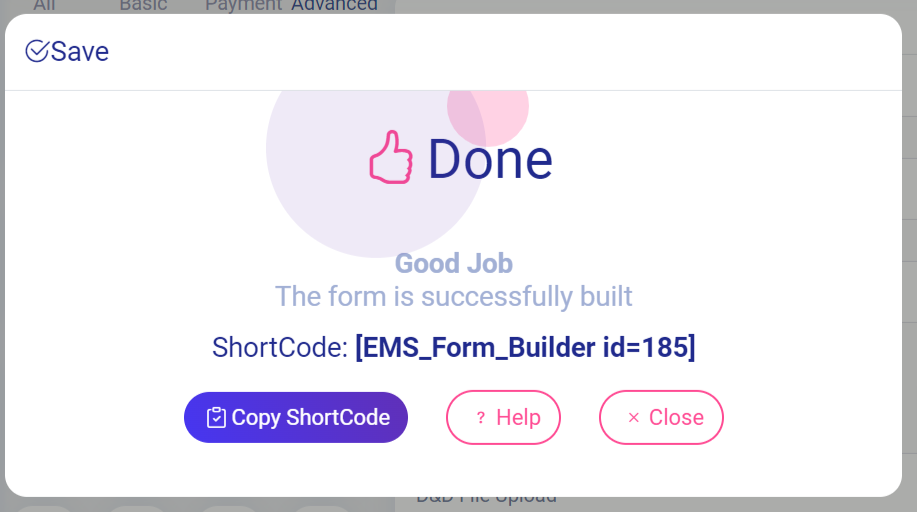
🌐 Step 5: Embed the Form on Your Website
- Go to any page or post
- Paste the shortcode for your form (e.g.,
[ EMS_Form_Builder id = 1]) - Update the page and preview it
Now your form is not only responsive and professional-looking — it’s protected by Google reCAPTCHA
💡 Bonus: What Makes Easy Form Builder a Smart Choice?
- ✅ Works with Google reCAPTCHA out of the box
- 🛠 No need for additional CAPTCHA plugins or SMTP setups
- 🔄 Real-time AJAX form submissions (no reloads)
- 💬 Built-in email notifications
- 📱 Fully responsive on mobile, tablet, and desktop
Whether you’re a blogger, agency, or business owner, this plugin gives you secure, fast-loading, and user-friendly forms in just minutes.
🚀 Final Thoughts
Spam is annoying, but stopping it doesn’t have to be complicated.
With Easy Form Builder and Google reCAPTCHA working together, you get a smarter, safer way to collect form data.
Ready to upgrade your forms?
🔗 Download Easy Form Builder for free and start building reCAPTCHA-protected forms on your WordPress site today.